PVE 换国内源
添加PVE8.0的清华源
- 文件 /etc/apt/sources.list
# 8.0清华源
deb https://mirrors.tuna.tsinghua.edu.cn/debian/ bookworm main contrib non-free non-free-firmware
deb https://mirrors.tuna.tsinghua.edu.cn/debian/ bookworm-updates main contrib non-free non-free-firmware
deb https://mirrors.tuna.tsinghua.edu.cn/debian/ bookworm-backports main contrib non-free non-free-firmware

# security updates
deb https://security.debian.org/debian-security bookworm-security main contrib non-free non-free-firmware- 文件 /etc/apt/sources.list.d/pve-enterprise.list
# 8.0官方企业付费订购源
deb https://mirrors.tuna.tsinghua.edu.cn/proxmox/debian/pve bookworm pve-no-subscription- 修复更新时源报401错
echo "deb http://download.proxmox.com/debian/ceph-quincy bookworm no-subscription" > /etc/apt/sources.list.d/ceph.list- 下载官方授权加密秘钥证书
wget https://enterprise.proxmox.com/debian/proxmox-release-bookworm.gpg -O /etc/apt/trusted.gpg.d/proxmox-release-bookworm.gpg- 后面就正常升级了
修改 CT Templates (LXC容器)源
将 /usr/share/perl5/PVE/APLInfo.pm 文件中默认的源地址 http://download.proxmox.com 替换为 https://mirrors.tuna.tsinghua.edu.cn/proxmox 即可。
可以使用如下命令修改:
cp /usr/share/perl5/PVE/APLInfo.pm /usr/share/perl5/PVE/APLInfo.pm_back
sed -i 's|http://download.proxmox.com|https://mirrors.tuna.tsinghua.edu.cn/proxmox|g' /usr/share/perl5/PVE/APLInfo.pm
针对 /usr/share/perl5/PVE/APLInfo.pm 文件的修改,重启后生效。
systemctl restart pvedaemon.service之后在 pve 网页端下载 CT Templates 速度就很快了。
PVE 连接无线网络
扫描、连接WiFi
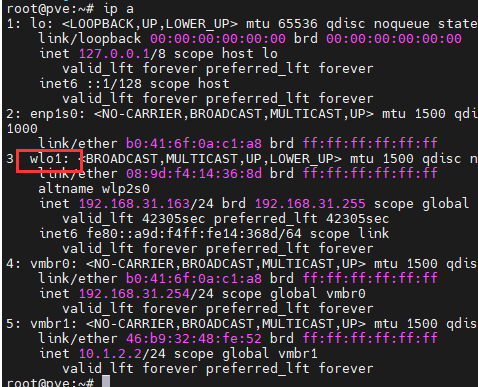
首先查看无线网卡名字
ip a

这里看到名字是wlo1。
需要验证无线网卡是否正常运作,我们先安装包
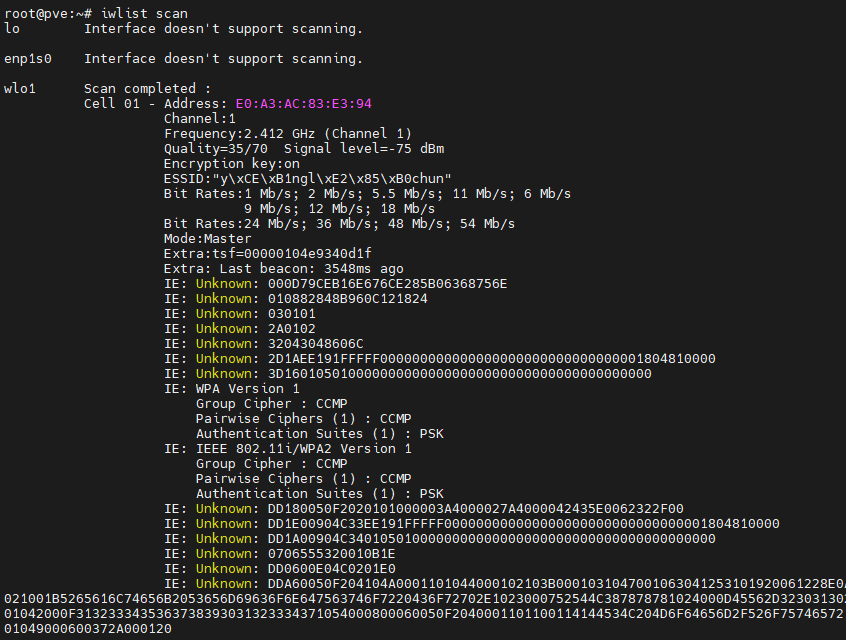
apt-get install wireless-tools wpasupplicant安装完成后使用ifup wlo1打开设备,并使用iwlist scan尝试扫描网络。

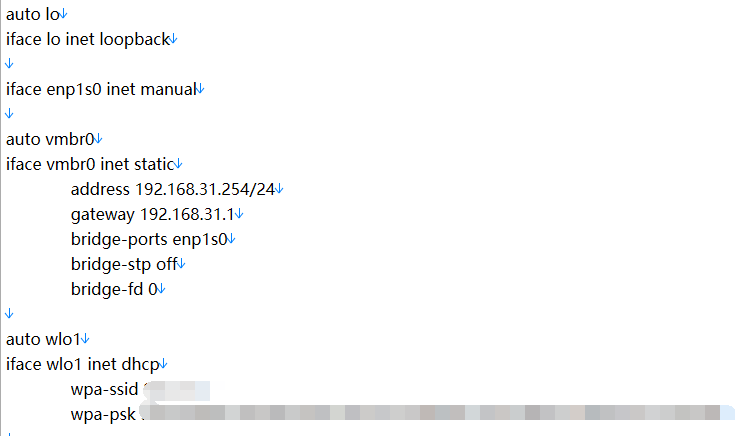
nano /etc/network/interfaces
auto wlo1
iface wlo1 inet dhcp
    wpa-ssid xxxx
wpa-psk xxxxwps-psk可以通过Wireshark · WPA PSK Tool计算出来。
也可以通过以下命令得到
wpa_passphrase "wifi名称" "wifi密码//下面是输出信息
network={
ssid="wifi名称"
#psk="wifi密码" //这句是注释掉的
psk=2c************************76 //生成的psk
}最后保存,重启即可。
调整路由
如果需要流量优先从无线网络发送,需要修改路由表。
- 调整前的路由表:
root@pve:~# route -n
Kernel IP routing table
Destination     Gateway         Genmask         Flags Metric Ref    Use Iface
0.0.0.0         192.168.31.1    0.0.0.0         UG    0      0        0 vmbr0
192.168.31.0    0.0.0.0         255.255.255.0   U     0      0        0 vmbr0
192.168.31.0    0.0.0.0         255.255.255.0   U     0      0        0 wlo1
原始的路由表默认是从vmbr0流出,而vmbr0桥接的是有线网络。
以下命令调整:
route add -net 0.0.0.0 netmask 0.0.0.0 gw 192.168.31.1 metric 0 dev wlo1
route del -net 192.168.31.0 netmask 255.255.255.0 metric 0 dev vmbr0
route add -net 192.168.31.0 netmask 255.255.255.0 metric 1 dev vmbr0
route del -net 0.0.0.0 netmask 0.0.0.0 gw 192.168.31.1 metric 0 dev vmbr0
route add -net 0.0.0.0 netmask 0.0.0.0 gw 192.168.31.1 metric 1 dev vmbr0- 调整后的路由表:
root@pve:~# route -n
Kernel IP routing table
Destination     Gateway         Genmask         Flags Metric Ref    Use Iface
0.0.0.0         192.168.31.1    0.0.0.0         UG    0      0        0 wlo1
0.0.0.0         192.168.31.1    0.0.0.0         UG    1      0        0 vmbr0
192.168.31.0    0.0.0.0         255.255.255.0   U     0      0        0 wlo1
192.168.31.0    0.0.0.0         255.255.255.0   U     1      0        0 vmbr0
然后就完成了。
PVE 虚拟机使用NAT网络
参考proxmox虚拟机使用NAT网络 - 哔哩哔哩 (bilibili.com)
大功告成!
最后贴一个完整的interfaces
# network interface settings; autogenerated
# Please do NOT modify this file directly, unless you know what
# you're doing.
#
# If you want to manage parts of the network configuration manually,
# please utilize the 'source' or 'source-directory' directives to do
# so.
# PVE will preserve these directives, but will NOT read its network
# configuration from sourced files, so do not attempt to move any of
# the PVE managed interfaces into external files!

auto lo
iface lo inet loopback

iface enp1s0 inet manual

auto vmbr0
iface vmbr0 inet static
    address 192.168.31.254/24
    gateway 192.168.31.1
    bridge-ports enp1s0
    bridge-stp off
    bridge-fd 0
    up route del -net 192.168.31.0 netmask 255.255.255.0 metric 0 dev vmbr0
    up route add -net 192.168.31.0 netmask 255.255.255.0 metric 1 dev vmbr0
    up route del -net 0.0.0.0 netmask 0.0.0.0 gw 192.168.31.1 metric 0 dev vmbr0
    up route add -net 0.0.0.0 netmask 0.0.0.0 gw 192.168.31.1 metric 1 dev vmbr0

auto wlo1
iface wlo1 inet dhcp
    wpa-ssid SEN_5G
    wpa-psk 987cb4f0d614fe9f6476fe91b59277b4dd5d156c444b5b3c4f89d1e8c3c46464
    up route add -net 0.0.0.0 netmask 0.0.0.0 gw 192.168.31.1 metric 0 dev wlo1
    down route del -net 0.0.0.0 netmask 0.0.0.0 gw 192.168.31.1 metric 0 dev wlo1

auto vmbr1
iface vmbr1 inet static
    address 10.1.2.2/24
    bridge-ports none
    bridge-stp off
    bridge-fd 0
    post-up   echo 1 > /proc/sys/net/ipv4/ip_forward
    post-up bash /root/iptables.config.sh
    post-up   iptables -t nat -A POSTROUTING -s '10.1.2.0/24' -o wlo1 -j MASQUERADE
    post-down iptables -t nat -D POSTROUTING -s '10.1.2.0/24' -o wlo1 -j MASQUERADE
参考链接:
PVE 8.0更换软件源以及升级-软路由,x86系统,openwrt(x86),Router OS 等-恩山无线论坛 - Powered by Discuz! (right.com.cn)
proxmox使用ax210连接无线网络 - 哔哩哔哩 (bilibili.com)
Proxmox(pve)使用无线网卡WIFI6-AX210教程 - 哔哩哔哩 (bilibili.com)
proxmox虚拟机使用NAT网络 - 哔哩哔哩 (bilibili.com)

1 条评论
博主真是太厉害了!!!